
This is a listing of the products I have used in the van build. I also list materials in each section of this website. Click the Bold Text or photo to go to that product. As an Amazon Associate I earn from qualifying purchases. So, I get commissions for purchases made through links in this website. The cost to you does not change.

Safety Glasses These safety glasses are so comfortable, at times I forget I am wearing them. This is the most important product on the list!
Trim removal tools
You will need these tools to make removing panels easier.

Magnetic Screens Side door and Rear Door
These screens are amazing. In a video we show how to customize these to fit the sliding door, and the rear door of the van. After customizing we never need to remove the screens. They fit even when opening an closing the door.

Rivnut tool
The Riv-nut tool is required when building a van. This tool makes it easy to make secure connections to the vans frame. I use this to secure the floor, wall panels, and the upper cabinets. I decided to use only three bolt sizes in the van build. 1/4″-20, 5/16-18, and M8.


I purchases these M8 bolts to fit exiting threaded hold-downs in the van. Some of these where used to bolt the floor.

Drill stops are required when building a van. These wills stop you from pushing through the frame and denting the outside walls. In the building tips video I show adding a collar, to ensure the drill stop can’t slip.
Framing Square
Combination Square

A framing square, speed square and long steel rule make building much easier. When cutting plastic and fabric you will want a long steel rule to cut against.

You will need several bar clamps. During the build I have found I tend to use the short bar clamps most often.
Drill bits
Of course you will need drill bits of all different sizes. Buying a full set of all the different sizes from Harbor Freight is good to have all the different sizes. But you will need quality bits in the common sizes. I have found Dewalt bits to be of good quality and last.

Hatch/skylight
Marine Hatch

I used this marine hatch to add a skylight and access to the roof above our bed. It is wonderful. It is a key design feature of the van. Its nice to watch the stars at night! It does not matter how you make your purchase, it will be expensive! The results are worth the expense. I made video showing the installation. Why a marine hatch? No plastic, its all aluminum and will probably last longer than the van!
Kitchen and shower
Sink – This sink is amazing. It is big. I do not like the tiny bar sinks I see in many vans. I wanted a functional sink that I could put a large spaghetti pot inside! Be sure to figure out your correct size in your layout.


Sink Sprayer – Some may think this is crazy, but we do not have a sink faucet. We don’t need one. Instead we have this sprayer that will lock in a open position.

R.O. Filter System
We have a reverse osmosis water filtration system in our van. So, we can be confident our water is clean and safe during our travels. In a video I show how I added valves to select when the system is in filtration mode, or in full reverse osmosis mode.


I placed a marine deck plate on the top of our water tank. This provides an easy way to fill it!

Water Tanks
Water tanks can be a pain. It is often difficult to find just the right size. I created a video showing the dimensions under the promaster van. This should help!

Electronic ball valves
These are magical. They will allow you to flip a switch and drain your grey tank.


We have a WATER BANDIT which will fit on almost any water tap and connect to a short garden hose for filling the jerry can. The Water Bandit is flexible and can be placed over most faucets to direct the water through a hose.

So far these pumps have been excellent. We have two in our van build. They have a 4 year warranty, which I have not needed to test since they have been working without error. But I do have an extra one just in case there is a problem. They have variable flow to reduce cycling.

UV sterilizer As an added precaution we have a UV water sterilizer on both our reverse osmosis drinking water system, and our recirculating shower.


We selected these solar panels due to their size. The fit perfectly across the rails on the top of the van. The provide 200 watts per panel in the smallest physical size.

I did a great deal of research on inverters and solar charge controllers. The key reason I selected Victron products was Bluetooth. They all integrate with each other and I can monitor everything from my phone.

I did a video explaining how to select the correct size of Solar Charge Controller.

One of the best products Victron has there battery monitor. If I was to have only one Victron product it would be the battery monitor. Having this allows you to monitor your electrical system with your cell phone. This is an excellent Frugal Factor approved product!
Anderson type Connectors: These are used to connect the batteries to the Inverter. It provides a quick easy way to connect and disconnect the batteries.


Ring Terminals with heat shrink


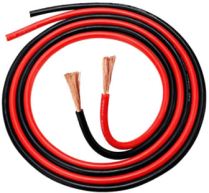
Ancor Marine Grade Duplex Wire
Ancor produces excellent marine grade wire. It is double insulated and fully tinned. I use 12AWG flat duplex wire for all of the 12 Volt DC applications in the van. Please see my video on wire size!

Heat Gun – If you do not have a heat gun you need one! It has many uses – applying heat shrink when making electrical cables, bending acrylic, removing labels, removing van ribs and more…..

Wire strippers – You will need a good pair of wire strippers. Having taught electronics for years, I have several.


TEMCO provides wire and solar cable. Made in the USA, this is high quality ultra flexible cable.
Solar cable is different. It will not be as flexible as other wire. Solar panel wire must have UV resistant insulation. If standard type electrical wire is used on the roof of your van the suns UV radiation will destroy the insulation on the wire. This may cause an electrical short, and possible solar panel failure.

![]()
![]()

For the AC power in the van I used a heavy duty extension cord for wiring. This was more cost effective than buying bear wire.
12 Volt Fuse Block
A 12 volt fuse block is needed to supply the different amperage fuses for your DC loads.


Lugs – to use these watch my video on making cables.
2/0 6 Ga 8 Ga

Hammer Crimper and easy cheap way to crimp!

Heat shrink tubing Clear Tubing
I have always felt that this is magical stuff!


Loctite
I use Loctite on all the electrical connection bolts! This glue-stick type is easy to use!


Butane Torch https://amzn.to/31F391Q


Bed Mattress
I was worried about ordering a mattress online. Its a big deal having a comfortable mattress in the van. No need to worry, this was an excellent mattress. At the time we purchase there were almost 100,000 reviews. So, it was worth a try. We are very happy with this purchase – excellent product and price!

Bed Rails – I purchased my bed rails from IKEA. These steel rails are expandable. So, they will fit any design width.-
![]()
![]()
Wood Slats – I also purchased the wood slats from IKEA. See my bed design video for more information.
VADANIA Industrial Ultra Heavy Duty Drawer Slides with Lock 52″ I used all Vadania drawer slides in my van build. They are heavy duty, and much stronger than I actually need.

Smaller Drawer slides for pullout table
T-Nuts – These are used in several areas in the van build. In the bike drawer slide, under the floor to hold down the sink/oven frame and in the overhead cabinets.

Birch Edge Banding – I used edge banding when making the pull out drawer for bike storage. I also used banding on the footrest. Edge banding is an easy way to get smooth edges, even if you are painting.
Edge banding trimmer – You can use a knife, or file if you do not have this trimmer. But the trimmer makes the job easy and fast!
